June 2016 archive

Bride to Be Chair Banner for Wedding Shower

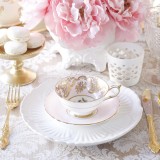
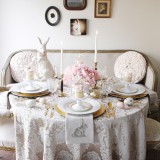
As a bride-to-be myself, I had so much fun creating this chair banner craft for my wedding shower concept. As you may have noticed, I love absolutely everything pink and gold, but recently I have been finding myself appreciating the colour yellow. On a recent antiquing trip with my dear friend Jennifer of Tufts and Toile, I found the perfect pale yellow tablecloth to compliment my wedding shower tablescape, which was a great score that only cost $10. I can’t wait to have my very own wedding shower — to come one day!

01_Paige Smith_Bride to Be Chair Banner_Wedding Shower_MG_1339

00_Paige Smith_Bride to Be Chair Banner_Wedding Shower_MG_1271

Materials
• Various crafting card stock in complimentary colours and patterns (yellow & pink)
• Alphabet letters (spray painted gold)
• Foam adhesive circles
• Washi tape to coordinate with paper stock
• Seam binding ribbon
• Decorative flower

02_Paige Smith_Bride to Be Chair Banner_Wedding Shower_MG_1707

Tools
• X-acto knife and blade
• Ruler
• Hole punch

03_Paige Smith_Bride to Be Chair Banner_Wedding Shower_MG_1391

Step 1
Measure and cut out ten rectangular cards in card stock of your choice that are 2 5/8″ wide x 3 3/4″ tall. You can use alternating paper designs for variety. Cut a triangular notch at the bottom of each card.

Step 2
With the hole punch, create 2 holes at the top of each card on both the right and left side.

Step 3
Arrange each letter of ‘Bride to Be’ on a separate card. You can either use glue to attach the letters to the cards. Or as I prefer, to use small foam adhesive circles that give dimension to the letters.

Step 4
At the top of each card, lay a strip of washi tape and trim the ends on either side of the card.

Step 5
Thread the seam binding through all of the holes in the cards to hang the banner.

04_Paige Smith_Bride to Be Chair Banner_Wedding Shower_MG_1424

05_Paige Smith_Bride to Be Chair Banner_Wedding Shower_MG_1438

06_Paige Smith_Bride to Be Chair Banner_Wedding Shower_MG_1849

Macarons by Sweet Philosophy

07_Paige Smith_Bride to Be Chair Banner_Wedding Shower_MG_1719

08_Paige Smith_Bride to Be Chair Banner_Wedding Shower_MG_1549

For each of the guests, I decorated the chiavari chairs with vintage jewelry necklaces for added sparkle and charm.

09_Paige Smith_Bride to Be Chair Banner_Wedding Shower_MG_1539

10_Paige Smith_Bride to Be Chair Banner_Wedding Shower_MG_1491


L-O-V-E Banner

Many years ago, I went on a crafting weekend retreat with a few of my girlfriends. Have you ever just crafted for 2 days straight? It was such a wonderful treat to be able to chit chat with my girlfriends and craft till the wee hours of the morning. With a box full of supplies —  little treasures, papers and trims — I made this banner spelling out L-O-V-E. I hang it up on Valentine’s day or for everyday inspiration in my studio.

Paige Smith_LOVE_banner_0

Materials & Tools
• Various card stock
• Lace and trims
• Pre-made glittered letters
• Beads from costume jewelry
• Tassels
• Small grommets
• Scissors
• Pinking shears
• Glue stick
• Hot glue sticks and gun
• Hole punch

Paige Smith_LOVE_banner_1

The following instructions are for one individual heart. Repeat steps for each letter of the word ‘LOVE’.

Step 1
Cut a heart shape out of card stock with pinking shears. Cut another heart shape out of patterned paper and glue stick it on top of the heart shape with zig zag edges.

Paige Smith_LOVE_banner_2

Step 2
Use hot glue to attach lace trim to the backside and outside edge of the zig zag heart.

Paige Smith_LOVE_banner_3

Step 3
With the hole punch, create small holes: 2 on either side and 1 hole at the bottom of the heart. From costume jewelry, create strands of beads to use as string to connect all heart letters together. Also, create a strand of beads with or without a tassel for the bottom decoration.

Paige Smith_LOVE_banner_4

Step 4
With the hole punch, create three small holes: 2 on either side and 1 hole at the bottom of the heart. With costume jewelry, create strands of beads to use as string to connect all heart letters together. Also, create a strand of beads with or without a tassel for the bottom decoration.

Step 5
Attach the glitter letter ‘L’ to the middle of the heart. For added dimension, you may also attach the letters onto small paper medallions.